The LED Troffers Guide for Office Lighting is your comprehensive roadmap for selecting, installing, and optimizing troffer fixtures for contemporary commercial spaces. This guide covers troffer types, specifications, energy and cost calculations, lighting design, control strategies, installation and maintenance, rebate and compliance considerations, and a practical ROI example you can adapt to your facility.
Why this guide matters
Office lighting affects comfort, productivity, energy costs, and maintenance schedules. Troffers — the rectangular or square fixtures normally used in grid ceilings — are among the most common commercial fixtures. Switching to modern LED troffers is one of the fastest ways to cut energy use, improve light quality, and reduce maintenance. This guide will help facility managers, designers, and building owners make decisions that are efficient, code-compliant, and cost-effective.
What are LED troffers?
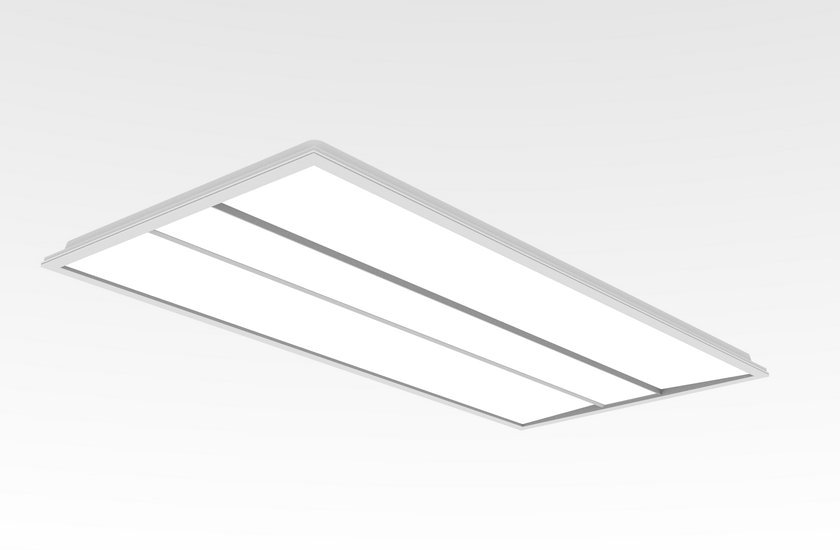
LED troffers are rectangular or square light fixtures designed to fit in standard suspended (drop) ceiling grids — typically 1×4, 2×2, and 2×4 footprints. Whereas traditional troffers used fluorescent lamps (T8/T5), LED troffers integrate LED light engines, optics, and drivers to deliver higher efficiency, longer life, and improved control.
Key practical benefits include:
- Lower energy consumption per delivered lumen
- Reduced maintenance costs due to long LED life
- Uniform, flicker-reduced lighting ideal for office tasks
- Flexibility with CCT and dimming controls
Key features and specifications explained
When evaluating LED troffers, use the following specification terms — understanding them helps you compare products fairly:
- Lumen output (lm) — total light emitted by the fixture.
- Luminous efficacy (lm/W) — lumens per watt; higher is better.
- Correlated Color Temperature (CCT) — measured in Kelvin (K): warm (2700–3000K), neutral (3500K), cool (4000–5000K).
- Color Rendering Index (CRI) — scale to 100; aim for CRI ≥ 80 for general office use and ≥ 90 for color-critical tasks.
- Rated life (L70) — hours until lumen output drops to 70% of the initial. Many LED troffers are rated 50,000+ hours.
- Driver type & dimming — 0-10V, DALI, TRIAC, or proprietary; confirm compatibility with building controls.
- Diffuser/optics — prismatic, micro-prismatic, lensed, or flat; affects glare and distribution.
- UL/DLC/ENERGY STAR listing — look for recognized certifications for quality and incentive eligibility. (See resources below.)
Troffer sizes and mounting options
Standard sizes:
- 1×4 (12×48 in) — narrow corridors, accent rows.
- 2×2 (24×24 in) — common in modern open-plan offices for modular design.
- 2×4 (24×48 in) — traditional office fixtures; good for large areas.
Mounting types:
- Recessed — sits within a T-bar ceiling grid (most common).
- Surface-mounted — for hard ceilings where a grid is not present.
- Suspended (pendant) — used for high ceilings or design-forward installations.
Choose the size and mounting type to match the ceiling grid and to meet lighting uniformity requirements.
Light quality: CRI, CCT, lumen output and lux targets
CCT and mood
- 3000K — warm, comfortable; used in lounge or breakout areas.
- 3500–4000K — neutral to cool; typical for offices that need alertness.
- 5000K+ — cooler daylight; used in task areas or warehouses.
CRI
A CRI of 80 is acceptable for most offices; 90+ is preferred if color accuracy matters.
Lux targets (recommended illuminance) — quick reference
- Reception/corridors: 100–200 lux
- General open office: 300–500 lux
- Task areas, design studios: 500+ lux
Sample lumens calculation (step-by-step):
Suppose you need 400 lux in a 100 m² open office.
- Required lumens = lux × area = 400 lux × 100 m² = 40,000 lumens.
- If each troffer delivers 4,000 lumens, the number of troffers = 40,000 ÷ 4,000 = 10 troffers.
- Account for maintenance factor and spacing — round up or adjust layout to maintain uniformity.
Energy, savings, and ROI — worked examples
Below is a practical energy and payback calculation you can adapt. I’ll walk through each step clearly.
Baseline assumptions (example scenario)
- Existing fluorescent troffer power (including ballast losses): 140 W per fixture.
- New LED troffer power: 40 W per fixture.
- Operating schedule: 10 hours/day, 250 workdays/year → 2,500 hours/year.
- Electricity cost: $0.12 per kWh (adjust to local rates).
- Number of fixtures: 100.
- Incremental cost to swap each fixture (LED minus salvage): $80 per fixture.
Step 1 — Energy saved per fixture (W and kW)
- Power saved per fixture = existing − new = 140 W − 40 W = 100 W.
- Convert to kilowatts: 100 W ÷ 1000 = 0.100 kW.
Step 2 — Annual kWh saved per fixture
- Annual saved energy = power saved (kW) × hours/year.
- = 0.100 kW × 2,500 hours = 250 kWh.
Step 3 — Annual cost savings per fixture
- Cost saved per fixture = 250 kWh × $0.12/kWh = $30.00 per year.
Calculation:
- 250 × 0.12 = 30.00 (two hundred fifty times zero point one two equals thirty).
Step 4 — System-wide annual savings
- For 100 fixtures, annual energy saved = 250 kWh × 100 = 25,000 kWh.
- Annual cost savings = 25,000 kWh × $0.12 = $3,000 per year.
Calculation:
- 25,000 × 0.12 = 3,000.00.
Step 5 — Upfront investment and payback
- Upfront incremental cost = 100 fixtures × $80 = $8,000.
Calculation: 100 × 80 = 8,000. - Simple payback = upfront/annual savings = $8,000 ÷ $3,000 ≈ 2.67 years.
Calculation: 8,000 ÷ 3,000 = 2.666… → about 2 years and 8 months.
Conclusion: Under these assumptions, LED troffers pay back in under 3 years — and after payback, you keep the energy savings for the lifetime of the fixture (often 10+ years). Be sure to adapt the numbers to your local energy rates and actual fixture wattages.
Controls, dimming, and smart integration
Smart controls multiply savings and improve occupant comfort:
- Occupancy sensors — reduce wasted time in infrequently used spaces.
- Daylight harvesting — dim fixtures near windows to maintain the target lux while saving energy.
- Scheduling — automatic on/off for nights and weekends.
- Networked control systems (DALI, BACnet) — central management, zone control, and analytics.
When specifying, confirm the troffer supports the driver and control protocol you plan to use (0-10V, DALI, Zhaga, or PoE). Matching controls properly prevents issues like flicker and ensures dimming smoothness.
Installation and retrofit strategies
New construction vs retrofit
- New construction — select recessed troffers that match the grid and lighting design; integrate controls from the start.
- Re retrofit — options include direct-replace LED troffers (drop-in), LED panels, or a complete fixture swap.
Practical retrofit tips
- Inspect the ceiling grid and plenum for wiring access and condition.
- Verify emergency egress lighting and maintain required services while replacing fixtures.
- Label circuits and test drivers for compatibility with controls.
- Consider staged rollouts: pilot one floor first to confirm glare, uniformity, and occupant feedback.
Safety note: All electrical work must be performed by qualified electricians and conform to local wiring codes.
Maintenance, reliability, and lifecycle costs
LED troffers typically have:
- Long rated life (50,000–100,000 hours).
- Lower maintenance frequency (no lamp relamping every few thousand hours).
- Failure modes — driver failures are most common; choose fixtures with modular drivers or warranty support for easy service.
When budgeting, plan for:
- Initial purchase and installation costs
- Reduced lamp and ballast replacement costs
- Controls and sensors lifecycle
- Disposal or recycling of old fluorescent lamps (requires hazardous waste handling for mercury lamps)
Compliance, certifications, and rebates
Certifications to look for:
- DesignLights Consortium (DLC) — often required for utility rebates. (see: https://www.designlights.org/)
- ENERGY STAR — credible performance and quality mark. (see: https://www.energystar.gov/)
- UL listings and CE marking (region dependent).
Tip: Many utilities and energy programs provide rebates for lighting upgrades; check local programs before purchase to reduce net project cost.
How to choose the right troffer — specification checklist
Use this checklist when comparing products:
- Focus on lumens and efficacy: lm/W is the most meaningful metric for energy performance.
- Confirm CCT and CRI: choose CCT 3500–4000K and CRI ≥80 for most offices.
- Verify dimming protocol: ensure driver supports required controls (0-10V, DALI, etc.).
- Check flicker and flicker index: low flicker is important for comfort.
- Look for DLC/ENERGY STAR/UL listings: increases chances for rebates and ensures quality.
- Consider warranty and serviceability: 5–10 year warranties are common; modular designs simplify repairs.
- Review lumen depreciation spec (L70): gives expected useful life.
- Assess optics and UGR (Unified Glare Rating): better optics reduce eye strain.
- Confirm mounting compatibility: ceiling grid size and plenum clearance.
- Evaluate the total cost of ownership: include installation, controls, maintenance, and disposal.
Case study & sample layout calculations
Example: 200 m² open office, design target 400 lux
Step 1 — Required lumens
- Area = 200 m²
- Target illuminance = 400 lux
- Required lumens = 400 × 200 = 80,000 lumens
Step 2 — Fixture selection
- Choose troffers rated at 4,000 lm each (delivered lumens)
- Number of fixtures = 80,000 ÷ 4,000 = 20 fixtures
Step 3 — Spacing & uniformity
- Arrange fixtures in a 4 × 5 grid for even distribution
- Verify spacing to mounting height ratios to meet uniformity (Uo) targets
Step 4 — Energy calculation
- If each LED troffer consumes 40 W, total power = 20 × 40 W = 800 W
- Convert to kW: 800 ÷ 1000 = 0.8 kW
- Annual energy (2,500 hrs) = 0.8 × 2,500 = 2,000 kWh per year
- At $0.12/kWh = 2,000 × 0.12 = $240 per year
This example shows how to scale lumens to area and compute energy use from fixture wattages.
FAQs
Q: Are LED troffers dimmable?
A: Many are. Verify the driver type and dimming protocol (0-10V, DALI, triac, etc.) and confirm compatibility with sensors and control systems.
Q: What CCT is best for offices?
A: 3500–4000K is common for general office use; cooler temperatures (4000–5000K) favor alertness in task-intensive areas.
Q: How long do LED troffers last?
A: Typical rated life is 50,000+ hours (L70). Real-world life depends on thermal management and driver quality.
Q: Do troffers require ballast removal?
A: When retrofitting from fluorescents, the ballast may need removal or bypass depending on the retrofit method. Follow product instructions and local electrical codes.
Q: Can I mix LED troffers with existing fixtures?
A: You can, but color and intensity differences may be noticeable. A full retrofit creates consistent light quality and control.
Final recommendations & next steps
- Pilot first. Replace a floor or a zone to validate light quality, glare, and controls.
- Specify controls early. Controls and fixture compatibility are a major determinant of savings.
- Apply for rebates. Check local utility incentives and use the DLC/ENERGY STAR lists.
- Use proper lighting design. Match lumens to your lux targets and prioritize uniformity.
- Track performance. Monitor energy usage after retrofit to validate savings and fine-tune controls.
Conclusion
LED troffers are a high-impact component in modern commercial lighting — offering immediate energy savings, improved light quality, and reduced maintenance. The LED Troffers Guide for Office Lighting above equips you with the technical knowledge, practical calculations, specification checklist, and next steps to plan a successful troffer project. Start with a pilot, confirm the savings with measurement, and scale the upgrade to realize multi-year cost and environmental benefits.